PASM: The Modes on Your Camera Dial Explained (and When to Use Them)
The knobs and dials on your camera can be intimidating at first, so it is easy to dial to auto mode and let the camera do the rest. If you’re an auto-mode shooter, you are really missing out. The other modes on your camera will give you many options to try and boost your creativity.
Curious to know more? Here are all the details about the different modes of your camera, or as it is also known, PASM.

Understanding the Exposure Triangle
Shooting in auto mode can be convenient for various situations. Still, if you learn other modes, you will enjoy the versatility of shooting artistic photos by controlling the settings on your camera.
To understand how to do this, you must know thebasics of the exposure triangle. Your camera has three major parameters that will decide the amount of light to allow into your camera:aperture,shutter speed, andISO.

The aperture value determines how much your lens will open to let in light. We call it f-number and usually denote it like f/1.8, f/3.2, f/8, and so on. With lower f-numbers, your lens will open wide, leading to a shallow depth of field. Vice versa happens with a larger f-number.
Shutter speed is the time your shutter remains open to take a picture. You will use a fast shutter speed like 1/250th of a second for fast-moving subjects.

Finally, ISO controls the sensitivity of your camera’s sensor.
We call it the exposure triangle because changing one parameter will impact the other two. So you have to balance the three to get correctly exposed photos.

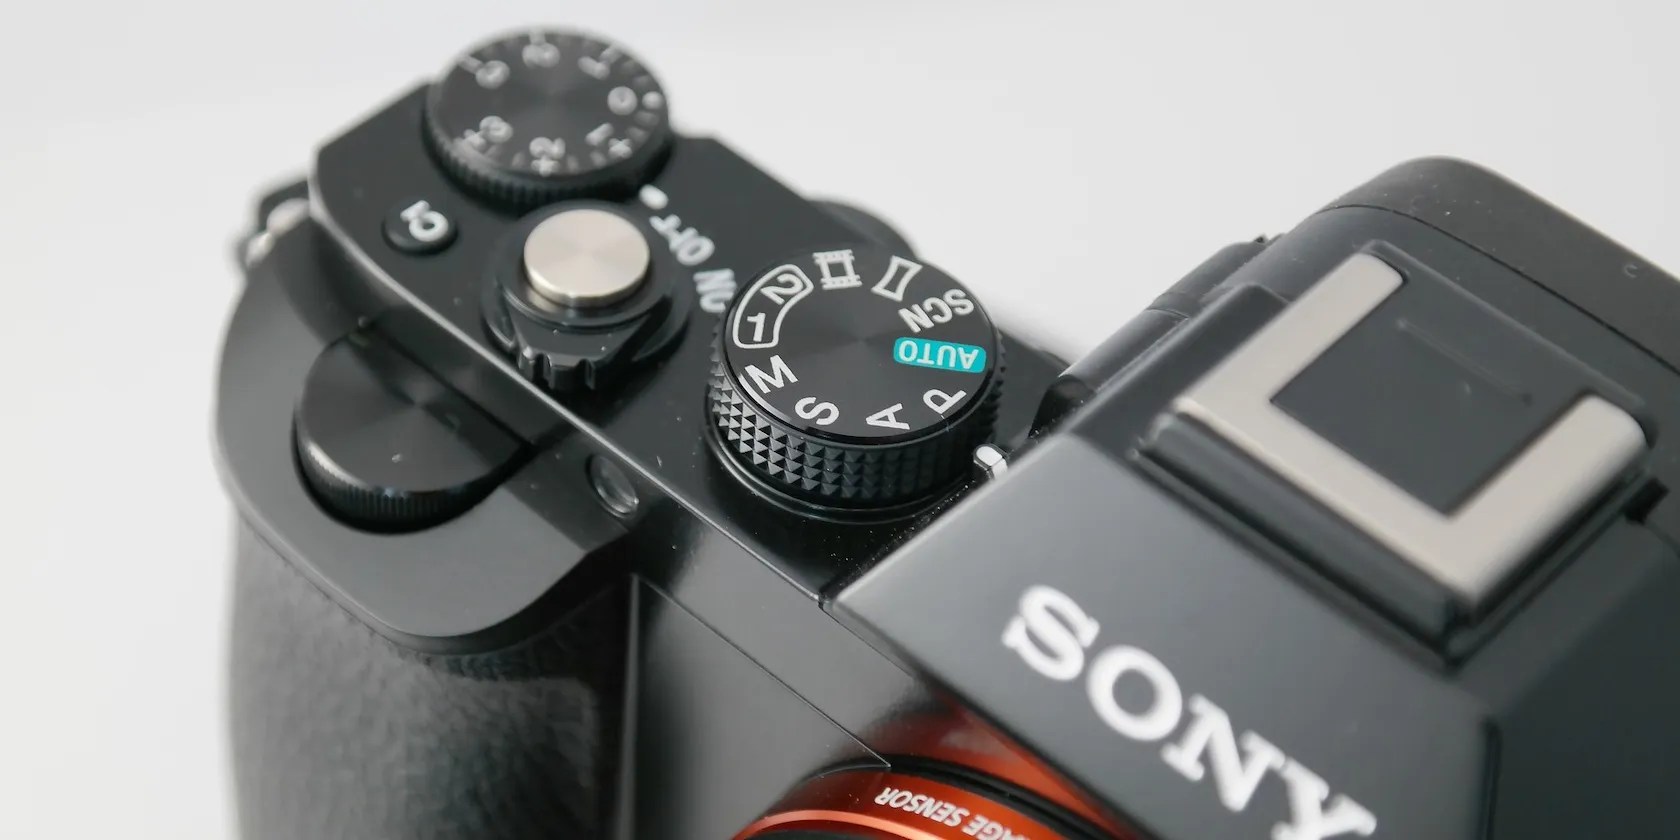
What Are the Modes on Your Camera?
Besides the auto mode, cameras usually have four modes:manual,aperture priority,shutter priority, andprogram modes, which together are referred to asPASM.
Manual Mode - M
If you’re a beginner photographer, this is not an easy mode to try. In manual mode, the camera will let you control all the elements of the exposure triangle, like aperture, shutter speed, and ISO. Also, you should take care of other parameters like white balance and focus area.
Many photographers prefer to use manual mode because it gives them complete control. However, there are too many things to remember and adjust in this mode. So you must thoroughly grasp photographic concepts and practice enough to make quick decisions.
Manual mode is best suited for landscape, food, and product photography. In short, it can be great for still subjects and in-studio photography, where you don’t have to make split-second decisions.
Astro and macro photographers swear by manual mode. That is because it is the best option if you want to nail the focus and get the correct exposure.
Although themanual mode is considered the holy grail for photographers, don’t fret over it too much. With fast-moving subjects, you will miss the shots if you’re constantly tweaking the settings. Instead, try the priority modes, which can be quick and handy.
Aperture Priority Mode - A (Av in Canon)
After auto mode, this is probably the best mode to start with. It is considered a semi-automatic mode along with shutter priority and program modes.
When you dial your camera to A mode, it will take care of the shutter speed for you. And you just have to adjust the aperture and ISO to your liking.
Aperture is the first thing you must play around with to get artistic photos. Aperture priority will let you do that without worrying about the other settings. Plus, you canuse the exposure compensation optionif you don’t like the exposure settings for whatever reason.
you’re able to use aperture priority for any type of photography, but it is beneficial for portrait, landscape, and macro photography.
Note that aperture priority mode is not ideal for fast-moving subjects. You can still use it, but remember to bump up the ISO so that you can keep your shutter speed fast without your camera making it too low.
Shutter Priority Mode - S (Tv in Canon)
As the name suggests, you will control the shutter speed and ISO while the camera takes care of the aperture. This is the mode to go for if your subject is constantly on the move, like wildlife, sports, and child photography.
you may play around with shutter priority to get different effects, from freezing motion to artistically adding blur. If you’re worried about shallow depth of field, do the same as the aperture priority mode—increase your ISO, so the aperture doesn’t open too wide.
Program Mode - P
The program mode allows you to control the third parameter in the exposure triangle—ISO. Your camera will adjust the aperture and shutter speed. While it is not as popular as the other two semi-automatic modes, this mode can still help take quick photos without fiddling with too many buttons.
If you’re a stickler for low noise in your photos, this is the mode to try. What’s more, you have control over other settings like white balance, metering, and exposure compensation.
Other Modes on Your Camera
Apart from the PASM modes, your camera will likely have other symbols on the dial. They are great for practicing and understanding how each mode works for a particular subject. Pay special attention to how the three parameters of the exposure triangle change.
Here’s a guide to the other modes and their uses.
Close-Up Mode (Flower)
This symbol indicates macro or close-up mode, perfect for shooting flowers and insects. This mode will usually choose a shallow depth of field.
Portrait Mode (Human Avatar)
This mode is for photographing people. The aperture and shutter speed will be mid-range to have the entire face in focus and separate the background.
Landscape Mode (Mountain)
The mountain symbol denotes nature and outdoor photography. The camera will choose a deep depth of field for landscape photos. In addition, the scene will have saturated colors in high contrast.
Night Mode (Stars or Crescent)
This mode will have a high ISO to shoot in low light. In addition, this mode may automatically activate the on-camera flash.
Sports Mode (Person Running)
This is the best mode for fast-moving subjects and sports as the shutter speed will be high.
No Flash Mode (Crossed Flash)
This mode is handy to use in places like museums where flash is prohibited. Your camera will calculate exposure based on the available light.
Get Familiar With Your Camera Modes
Being in auto mode can be limiting. Although the different knobs and buttons can look scary, don’t stop yourself. Remember, things are only complex until you learn them. So, turn the dial on your camera and start experimenting.
Understanding the different camera focus modes will help you level up your photography. Here’s what they are and when to use them.
You don’t need to fork out for expensive hardware to run an AI on your PC.
These plugins will make you wonder why you used Photoshop in the first place.
Not all true crime is about hacking, slashing, and gore.
Some subscriptions are worth the recurring cost, but not these ones.
Sometimes the smallest cleaning habit makes the biggest mess.
